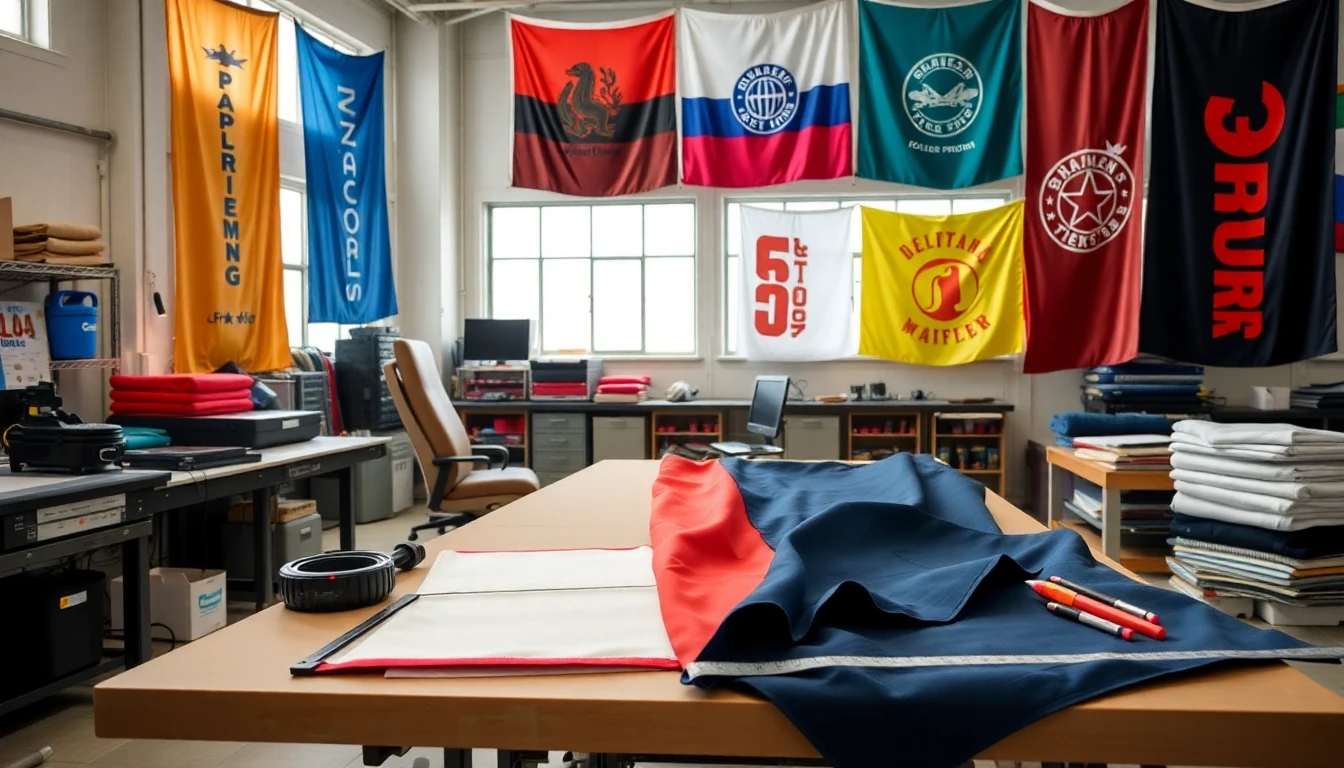
1. Defining Your Purpose and Flag Specifications

Before you dive into colors and graphics, pause for a moment. Ask yourself: Why do you need this flag? This simple question shapes everything else. The fabric you choose. The size you order. How you approach the design itself.
Your flag's purpose isn't just a detail. It's the foundation.
Understanding Your Flag's Mission
Get clear about your flag's role. The path forward becomes straightforward. Let's explore the three main categories:
Marketing & Branding flags are workhorses. Think trade show booths, storefronts, and corporate events. These flags need to stand up to wind, sun, and repeated use. They must maintain their vibrant appearance. Color accuracy matters here. Your brand's signature red needs to match across every touchpoint. You'll want durable custom flags that represent your business with consistency and professionalism. Many businesses turn to a custom flag maker to ensure their brand colors translate well to fabric.
Event flags live for the moment. Festivals, conferences, parades, sporting competitions—these occasions demand visual impact above all else. Portability becomes crucial. You'll be setting up and breaking down displays multiple times. Your custom outdoor flag needs to catch eyes from a distance. It should photograph well for social media. Think bold shapes, high contrast, and movement.
Personal & decorative flags give you creative freedom. Garden flags celebrating the seasons, memorial tributes, party decorations, graduation celebrations—these projects prioritize your vision over commercial durability standards. You can experiment here. Play and create something meaningful. No need to worry about corporate brand guidelines.
Selecting Your Flag's Physical Form
Once your purpose is crystal clear, you'll choose dimensions and shape. This isn't random. Your display environment tells you what will work.
Standard rectangular flags remain the most versatile choice. Designing a custom flag online for national symbolism or personal expression? This classic shape works everywhere—from flagpoles to walls to parade routes.
Feather flags command attention. These tall, narrow banners range from 8 feet to 17 feet in height. They're dynamic and eye-catching. Perfect for outdoor events where you need to draw people toward your booth or entrance. The gentle flutter creates movement that static signs can't match.
Teardrop flags offer distinctive curves. Standing 8 to 15 feet tall, these shapes provide high-impact vertical displays. Businesses love them for outdoor advertising. That unique silhouette stands out in crowded environments.
Custom shapes let you break the mold. Triangular pennants, elegant swallowtails, or unique outlines—these depend on your manufacturer's capabilities and available templates.
Getting the Proportions Right
Viewing distance meets physics here. A helpful rule guides your size selection: your flag's length should measure about one-quarter to one-third of your flagpole's height. This creates visual balance. It allows proper movement.
3'x5' flags (36"x60") represent the standard workhorse size. They're perfect for residential flagpoles around 20 feet tall, indoor displays, and smaller events. Most custom flag size options start here. It's practical for almost any use.
2.5'x4' flags fit well on house-mounted poles (5-8 feet) or garden stakes. They're intimate and approachable. Ideal for personal displays.
4'x6' flags step up for medium-sized outdoor installations. Think institutional buildings, parade floats, or community events. You need presence without overwhelming the space.
5'x8' flags or larger make bold statements. These dimensions suit commercial buildings, schools, hospitals, and stadiums with 30-foot-plus flagpoles. Need visibility from highways or across large campuses? These sizes deliver impact.
The relationship between your flag and its pole matters more than you might think. Too small, and your flag looks timid. Too large, and it can strain the pole or tangle in the wind.
Your flag printing service can guide you through these proportions. But understanding the principles helps you make confident decisions from the start.
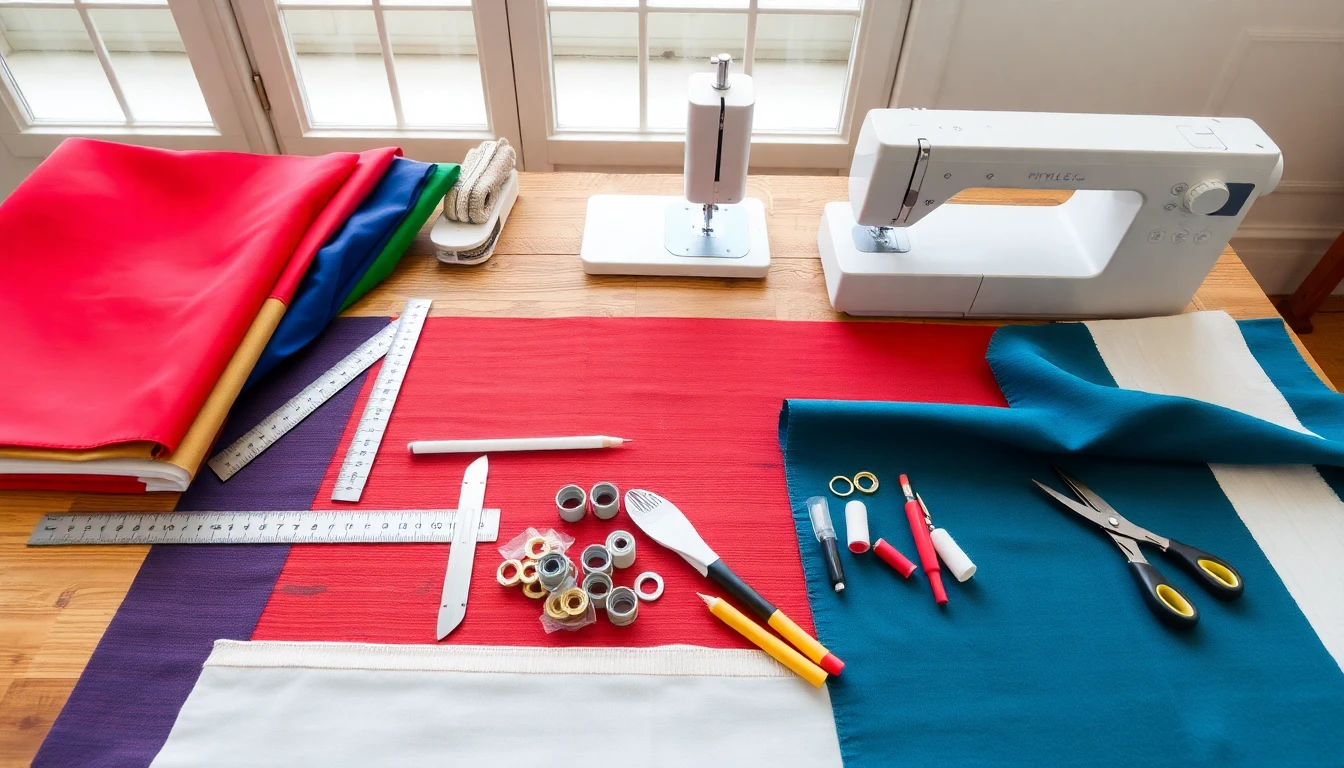
2. Gathering Materials & Tools
Now comes the exciting part—gathering what you need to bring your vision to life. Think of this as assembling your creative toolkit. The right materials make all the difference. You get a flag that fades after three months, or one that waves for years.
Let's break this down into manageable pieces.
Choosing Your Flag Fabric
The fabric isn't just background. It's the canvas that holds your colors, withstands the elements, and tells your story day after day.
Polyester is the champion for outdoor use. This material gives you great color reproduction. Plus, it shrugs off UV rays and weather extremes. Work with a custom flag maker? They'll often recommend polyester as the industry standard. The denier weight matters here—think of it as the fabric's strength rating. You'll see 68D, 100D, and 150D options. High-wind zones need stronger flags. 150D polyester flag printing gives you better tear resistance. This heavyweight option handles constant outdoor exposure.
Nylon brings a different personality to your project. Lightweight and graceful, it catches even the gentlest breeze. The colors pop with striking vibrancy. It dries fast after rain—a practical advantage you'll appreciate. Commercial-grade 200 Denier nylon works well for home displays and moderate outdoor conditions. Choose nylon for a flag that dances in the wind with elegant movement.
Cotton brings tradition. This classic material creates that authentic, heritage look. But cotton needs protection from the elements. Reserve it for ceremonial occasions, indoor displays, or brief outdoor events. Rain and moisture aren't cotton's friends.
Here's a helpful comparison for custom outdoor flag materials:
Material | Weight | Expected Lifespan Outdoors | Standout Qualities |
|---|---|---|---|
Nylon | 200D | 6–12 months | Lightweight, vibrant, flies well in gentle wind |
Polyester | 150D | 12–24 months | Durable, weather-resistant, excellent UV protection |
Polyester (2-ply) | 150D–200D | 24+ months | Heavy-duty, perfect for constant high-wind areas |
Essential Tools for Flag Construction
Creating durable custom flags requires the right equipment. You don't need a factory—just smart, reliable tools.
For cutting and measuring: Invest in a sharp rotary cutter or pro-grade fabric scissors. Pair these with a metal ruler or tailor's tape measure. Precision here prevents headaches later.
For marking: Fabric-safe marking pens or tailor's chalk let you sketch your design guides and seam lines onto material. These marks guide your work. They won't leave permanent traces.
For sewing: A sturdy sewing machine becomes your workhorse. Make sure you have heavy-duty needles designed for flag materials. Regular needles won't cut it—they'll break.
For securing: Stock up on fabric pins or clips. These hold your pieces and hems steady while you work.
For finishing touches: You'll need a grommet press or hand-held grommet kit for mounting hardware. Working with heat transfer graphics in your flag design software? An iron or heat press completes the picture.
Critical Finishing Materials
The finishing materials determine whether your flag survives or gives up to the elements.
Thread choice matters. Always use UV-resistant polyester thread. Regular thread breaks down under sunlight. Your beautiful flag can fall apart at the seams. Don't let this be your story.
The header reinforces where your flag meets the pole. Use a 3-inch strip of heavy-duty white canvas along the hoist edge. This creates stability for your grommets.
Grommets are those metal rings that connect flag to pole. Brass #2 grommets with a ⅜-inch inner diameter work for standard flags. They resist rust and stay strong.
Digital Design Requirements
Using a flag printing service or working with digital flag printing? Your artwork file becomes a key material.
File format matters: Vector formats—AI, EPS, or SVG—scale without quality loss. Raster images like JPEG or PNG need 300 dpi resolution at final print size. No exceptions.
Color mode: Set files to CMYK for professional printing. Need exact brand colors? Specify Pantone Matching System (PMS) codes while you design custom flag online.
Bleed and safe areas: Add 0.5 to 1 inch of bleed beyond your edges. This ensures colors reach the very edge after trimming. Keep important text and logos inside the safe area, away from cut lines.
Your Practical Shopping List
For a standard 3'x5' outdoor flag with polyester flag printing, gather:
1.25 yards of 150D polyester fabric
One 3" x 36" heavy-duty canvas strip
Two #2 brass grommets
One spool UV-resistant polyester thread
Design file: 36" x 60" vector (or 300 dpi raster), CMYK mode, 1-inch bleed
With these materials and tools assembled, you're ready to create something that lasts.
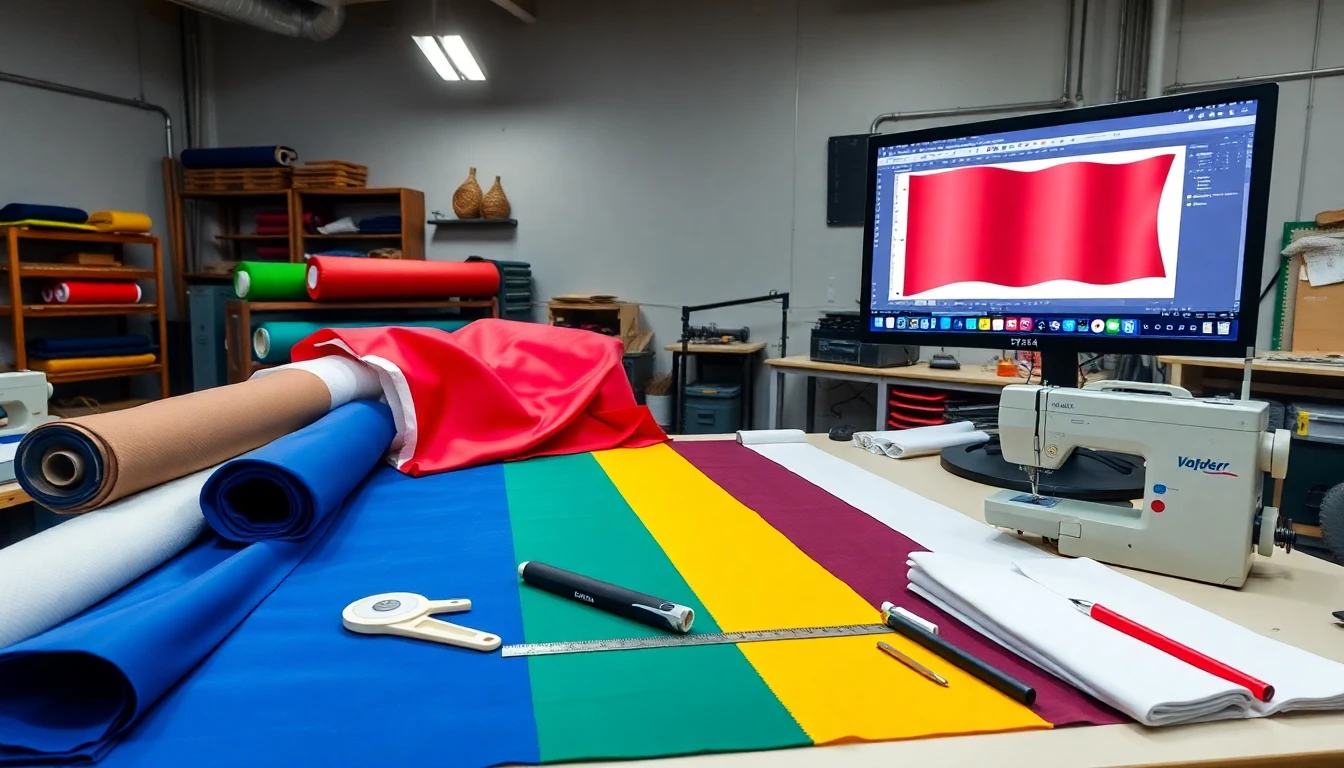
3. Creating the Flag Design
This is where your vision takes shape. You've gathered your materials. You understand your flag's purpose. Now ideas become something real—something that will wave in the wind and catch eyes from across a field.
Deep breath. Let's make this good.
Understanding Classic Flag Proportions
Before you start dragging elements around in your flag design software, know this: proportions matter. They create balance. They give your flag that "feels right" quality.
The traditional flag ratio sits at 1:1.9—height to width. This isn't random. History has tested it. It works.
Think of it this way: your flag's height measures 1 unit. The width stretches to 1.9 units. For a standard 3'x5' flag, that's 36 inches tall by 60 inches wide. The math lines up.
Want to design custom flag online with more complex elements? The U.S. flag offers a masterclass in proportional design. Study how it's built:
The hoist (height) measures 1.0 unit. The fly (width) extends 1.9 units. The canton—that blue field where stars live—takes up 7/13 of the total height (0.5385 units). It spans seven stripes. The width? That's 2/5 of the total fly, or 0.76 units.
Each of the 13 stripes claims 1/13 of the total height. Stars? Their diameter measures about 4/5 of one stripe's height. Everything relates to everything else. Nothing floats around at random.
You don't need to copy this. But these math relationships help you create visual harmony in your own design. Your eye might not notice these proportions. But it feels the balance.
Preparing Your Digital Files for Professional Printing
Amateur projects and professional results split here. Your digital flag printing provider needs specific file formats. Give them what they need. Your colors will pop. Your edges will be crisp. Skip these standards? Expect disappointment.
Vector formats rule this world. Save your design as AI (Adobe Illustrator), EPS, or PDF. Why? Vector files scale without losing quality. Your custom flag maker can print your design at any size—from a tiny 12-inch pennant to a massive 20-foot banner. The image stays sharp.
Raster files like JPEG or PNG? They pixelate when you make them bigger. Use them if you must—and make sure they're 300 dpi at final print size.
Color accuracy demands precision. Specify colors using Pantone Matching System (PMS) codes. PMS gives you exact, standardized colors that printers can match. Working with polyester flag printing? Those PMS codes ensure your brand's signature blue looks the same across every flag you order.
No PMS codes available? Provide HEX or RGB values. Just know this: what you see on your screen won't match fabric. Screens emit light. Fabric reflects it. The difference matters.
Bleed and safe areas protect your design. Add a bleed of 0.125 to 0.25 inches around your entire design. This extra border extends beyond the final trim edge. Machines cut and hem your flag. That bleed prevents white gaps from appearing.
The safe area lives inside that border—0.5 to 1 inch from the finished edge. Keep your logo here. Keep your text here. Keep anything important here. Elements outside the safe zone risk getting stitched over or trimmed away during production.
Convert all text to outlines. This step transforms your words into shapes. Why bother? Font files can cause compatibility problems. Your printer might not have your exact typeface. Text converted to outlines removes that risk.
Building Your Design Step-by-Step
Ready to create? Let's walk through this. These steps work with professional software or design custom flag online tools.
Step one: Set up your canvas. Create a new file at your final flag dimensions. For that standard 3'x5' flag, that's 36 inches by 60 inches. Make sure your software is set to inches, not pixels or points.
Step two: Establish your guides. Mark the bleed area around all edges. Mark the safe zone inside that. Planning a canton or complex element positioning? Mark those dimensions now using rulers and guides. These invisible lines become your roadmap.
Step three: Choose and use your colors. Select your palette with care. Assign PMS codes to each color element in your design. This keeps your custom flag size options consistent in color. Small garden flag or massive outdoor banner—they all match.
Step four: Arrange your visual elements. Place your logo, emblems, and text within that safe area you marked. Working with repeating patterns like stars, stripes, or geometric shapes? Calculate their spacing using proportional rules. Precision here creates professionalism.
Step five: Step back and review for visibility. Zoom out. View your entire design at a distance. Flags live outdoors. People see them from across parking lots, from moving cars, from stadium seats. Your key elements need to read from 50 feet away. Too small? Scale them up. Too cluttered? Cut it down.
Step six: Finalize and export. Double-check that all text is outlined. Verify your bleed extends the right amount. Save your final design as a vector PDF or EPS file. Name it with clarity. Include dimensions in the filename. Your flag printing service will thank you.
Putting It All Together: A Practical Example
Let's use these principles on that 3'x5' flag:
Your canvas size starts at 36" x 60". Add your bleed. The document expands to 36.5" x 60.5"—that extra quarter-inch on all sides.
The safe area keeps your logo and text at least 1 inch from all four edges. This zone protects what matters most.
Planning a canton in your design? Calculate it: 36 inches x 0.5385 = 19.38 inches high. And 60 inches x 0.76 = 45.6 inches wide. Mark these dimensions in the top-left corner of your canvas.
Label your colors with PMS codes. Note them in your file: PMS 186 C for red, PMS 280 C for blue, whatever your palette requires.
Export as a print-ready PDF or EPS. All fonts outlined. Bleed included. Colors specified.
You now hold a professional-grade design file. Your durable custom flags start here—with attention to detail, respect for proportions, and technical precision that gives you beautiful results.
4. Preparing Fabric and Pieces
You've got your design file ready. Your fabric sits waiting. Now comes the hands-on work—the part where you transform flat material into something that will wave in the wind.
This stage separates flags that last from flags that fall apart. Take your time here. Rush through preparation and you'll redo work later. Let's get it right the first time.
Pre-Treating Your Flag Fabric
Your fabric arrives from the supplier. Don't cut into it yet. Pre-treatment saves you trouble later.
Wash your fabric first—cotton and other natural fibers need this step. Washing removes sizing chemicals and factory residue. It also pre-shrinks the material. Picture sewing a perfect flag, then watching it warp and pucker after the first rain. Pre-washing stops this from happening.
For polyester flag printing materials? You can skip the wash. Synthetic fabrics don't shrink like natural ones. But a gentle rinse still helps. It removes dust. It makes the surface ready for heat transfer or dye sublimation.
Drying matters as much as washing. Tumble dry your fabric on low heat, or air-dry it flat. High heat can damage synthetic fibers before you even start. Pull the fabric from the dryer while damp. This makes the next step easier.
Ironing and Pressing Techniques
Wrinkles are your enemy. They create uneven printing. They throw off your measurements. They make cutting a nightmare.
Set up your ironing board in a well-lit space. You need room to work. A cramped corner leads to mistakes.
Temperature settings depend on your fabric type. Polyester needs medium heat—around 275°F to 300°F. Too hot, and you'll melt the fibers. Cotton handles higher temperatures, up to 400°F. Not sure? Start cooler and turn up the heat as needed.
Use a pressing cloth for synthetic materials. This thin barrier protects your fabric from direct heat. An old cotton pillowcase works well. Place it between your iron and the flag material.
Press, don't slide. Lift the iron and set it down in sections. Sliding creates stretch and distortion. You want flat, smooth fabric—not material that's stretched a half-inch longer than your measurements.
Work across the entire piece. Check both sides. Turn the fabric over and press from the back too. This kind of care creates pro-level results.
Transferring Your Design onto Fabric
Your digital file lives on a screen. Your flag lives in the physical world. The bridge between them is the transfer process.
For pro results, send your fabric to a flag printing service that uses digital flag printing technology. Dye sublimation creates vibrant, long-lasting colors. The ink becomes part of the fabric itself. These aren't surface decorations that peel or crack.
Working at home? You have options. Heat transfer paper lets you print designs on an inkjet printer, then iron them onto light-colored fabrics. Follow the maker's instructions word for word. Temperature and pressure timing are critical here.
Fabric paint and stencils give you another route. This old-school approach works well for simple, bold designs. Cut your stencil from cardboard or acetate sheets. Secure it to your ironed fabric with painter's tape. Dab paint on with a foam brush or stencil brush—never use brushing strokes that push paint under the edges.
Mark your cutting and sewing lines with fabric-safe chalk or disappearing ink pens. Measure twice, mark once. These guidelines keep your pieces accurate during cutting.
Cutting Your Fabric Pieces with Precision
Sharp tools make clean cuts. Dull scissors create jagged edges that fray and look sloppy.
Use a rotary cutter and self-healing mat for straight edges. This combo gives you sharp, clean precision. Line up your metal ruler along your marked line. Roll the cutter with firm pressure along the edge. One smooth pass beats multiple choppy cuts.
Fabric scissors work for curves and details. Keep these scissors for fabric use alone. Cutting paper dulls them fast. Dull scissors grab and pull fabric instead of slicing through it.
Cut with confidence, but check your measurements first. The old carpenter's rule applies here too: measure twice, cut once. That extra minute of checking saves yards of wasted material.
For custom outdoor flag projects with multiple pieces—complex designs with separate canton sections or appliqué parts—label each piece right after cutting. Write on masking tape stuck to the back. Note which edge is top, which is bottom. Future you will be grateful.
Organizing Cut Pieces for Setup
You've cut everything. Now what? Good setup stops chaos before it starts.
Create a staging area near your sewing machine. Lay out pieces in the order you'll sew them. Your main flag body goes here. Header strips there. Hem allowances here.
Group similar tasks together. All your hem folds. All your header attachments. All your reinforcement stitching. Working in batches creates rhythm and speed.
Pin or clip pieces that will be sewn together. Position them the way they'll be joined. This preview catches alignment problems before you commit with stitching.
Pro custom flag maker studios use numbered setup steps. You can too. Number your pieces with that fabric chalk. Write "1: Attach header to hoist edge" on a sticky note. "2: Hem top edge." Build your roadmap.
Your prep work is complete. The fabric is clean, pressed, cut, and organized. Everything waits in its proper place. The exciting part—the actual building—comes next. But this foundation you've built? This decides whether your flag waves strong for years or fails within weeks.
You've invested the time. You've done it right. That matters more than you might realize right now.
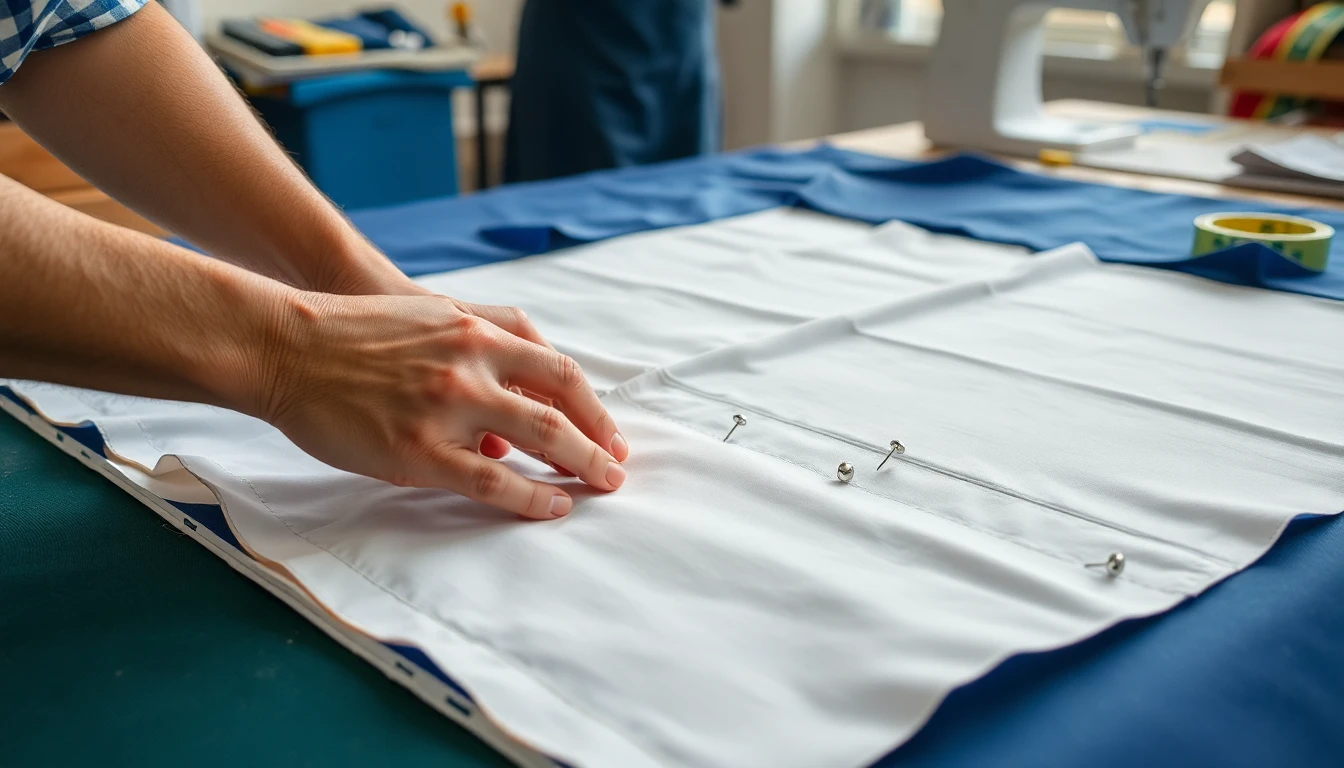
5. Transferring and Pinning the Design
Your fabric is pressed and cut. Your design file is perfect. Now digital meets physical—your vision touches the material that will wave in the wind.
This step decides if your flag looks professional or homemade. Elements will align or drift. Colors will land where they should or wander across the fabric. Let's make this precise.
Getting Your Design onto the Fabric
The transfer method depends on your flag's size and design complexity. Small garden flags need different approaches than massive commercial banners.
For large flags, projection saves hours of tedious work. Set up a digital projector in a darkened room. Project your design file onto your laid-out fabric. Trace the outlines with tailor's chalk or washable fabric markers. The image stays in perfect proportion. You won't stretch or shrink elements by mistake.
No projector? The full-scale paper overlay method works great. Print your design at actual size through your flag design software. Yes, this means taping multiple sheets together for a 3'x5' flag. It takes patience. But the accuracy is worth it. Secure these paper templates to your fabric with temporary adhesive spray or re-positionable tape. Working with unusual shapes—those teardrop or feather flags popular for outdoor events? Use the manufacturer-specific templates for your overlay. These account for the curves and angles that make custom outdoor flag shapes stand out.
Tracing with fabric markers gives you direct control. Use tailor's chalk for dark fabrics. Washable fabric markers work on lighter materials. Outline each design element right onto your flag fabric. Take your time here. Rushed lines lead to uneven edges.
For intricate, multi-color designs heading to a custom flag maker or flag printing service, label different areas with color codes. Write small notes that match your design file. "PMS 186 C" in the corner of a red stripe. "Navy blue—PMS 280 C" on that star field. These labels prevent confusion during sewing or appliqué work.
The safe area protects your design. Keep all transferred elements at least 0.25 to 0.5 inches from the fabric edge. Remember that bleed we talked about? This safe zone ensures your design doesn't get caught in seams or trimmed during finishing. For digital flag printing projects sent to professionals, this margin stops important elements from disappearing under the hem.
Planning a double-sided flag? You must align and pin both fabric halves at the same time. The images on front and back need to match. Lay one piece right-side-up. Position your second piece right-side-down on top of it. Pin through both layers. This ensures the flag displays the right way from either direction.
Strategic Pinning for Stability
Pins seem simple. But proper pinning prevents disasters. Your design can shift during cutting or sewing. Curves can distort. Edges can creep. Strategic pinning stops all of this.
Pin placement density matters. Place straight pins every 1 to 2 inches along your design's boundary lines. This creates enough hold without turning your fabric into a pincushion. Working on very large flags—those 6'x10' monsters or bigger? You can increase spacing to every 6 to 8 inches. The sheer size creates its own stability.
But for durable custom flags meant for high-stress outdoor use? Tighten that spacing back down to every inch. Wind puts huge force on fabric. Dense pinning during construction ensures every seam, every appliqué edge, stays where you placed it.
Corners and curves demand extra attention. These areas experience the most stress. They're also where misalignment shows up most. Add extra pins at each corner. Follow curves with pins placed perpendicular to the curve line. This prevents fabric from buckling or pulling.
Pin selection prevents fabric damage. Not all pins work for all materials.
Flat-head pins are your friend for thin, slick materials like 200D polyester or nylon. The flat head distributes pressure well. It prevents puckering in these smooth fabrics that your polyester flag printing provider will love working with.
Extra-long quilting pins handle heavier materials like canvas or bunting. You need that extra length to penetrate thick layers and maintain grip.
Heat-resistant pins become essential if you plan to iron the design before sewing. Regular pins can melt or discolor under heat. Heat-resistant pins let you press while pinned—a real time-saver.
For high-volume work or commercial custom flag size options, use a grid mat underneath your fabric. The measurement lines built into these mats speed up alignment. You can also use temporary adhesive lines—called pre-basting—for straight edges. Supplement these with pins at irregular or curved boundaries.
Here's the truth: temporary adhesives work fine for design custom flag online projects heading to digital printing. The printer just needs flat fabric. But for appliqué or sewn flags? Strong pinning throughout is a must. Stitching creates movement. Pins maintain alignment through that process.
Final Quality Check Before Moving Forward
Before you pick up scissors or thread, verify everything one more time. This thirty-second check prevents hours of rework.
Check your alignment tolerance. For standard-sized flags, center your design within ±1/16 inch. Measure from the edge to your design boundary on all four sides. The measurements should match. For large commercial flags, you get a bit more leeway—up to ±1/4 inch tolerance. But tighter is always better.
Verify visual consistency. Walk around your pinned fabric. Look from different angles. All pins should be fastened tight. Your chalk or marker lines should be visible and match your planned color areas. Any area that looks off? Fix it now.
Confirm proper centering. Does your design follow the flag's intended proportions and ratios? This matters for flags that follow government or industry standards. Your canton should measure where you calculated it. Your stripes should divide the same. Your logo should sit in the center—or wherever your design file specified.
Everything looks right? All pins are secure? Your lines are clear? You're ready to move forward. The foundation is solid. The next steps will build on this precision you've created right here.
6. Assembly and Sewing
Your flag pieces are cut and pinned. The real building begins now. Fabric transforms into something that will catch wind and hold strong.
Sewing a flag isn't like sewing a pillowcase. The forces are different. Wind whips and pulls. Sunlight beats down. Your stitches need to hold through all of it.
Let's build this right.
Protecting Your Design During Construction
Think about where your seams will land before your needle touches fabric. Design elements have homes. Hardware will punch holes. Keep these separate.
Keep all critical artwork and text inside a safe area—at least ⅝ inch away from your finished flag edge. This buffer zone matters more than you think. Hems fold over edges. Grommets pierce through corners. That beautiful logo or text you positioned? A hem can swallow it. Grommet installation can damage it.
Working on designs with multiple pieces? Stars, stripes, emblems that meet at seams? Budget extra time. Multi-part custom flag maker projects need precision. Every piece must align across seams. Rush this and your stars look crooked. Your stripes won't line up. Take it slow.
Joining Your Fabric Panels
Flags with multiple colors or horizontal stripes start here. You're joining separate pieces into one cohesive field.
Position your panels right-sides together. Pin along the seam line. Use a double-stitched seam for strength. Your stitch density should hit 5 to 8 stitches per inch. This isn't random. Fewer stitches create weak points. The fabric can pull apart between stitches under wind stress.
Thread choice matters just as much as stitch count. Always use UV-resistant polyester thread. Regular thread breaks down in sunlight. Your flag can fall apart at the seams after a few months outdoors. UV-resistant thread holds strong through seasons of exposure.
Press your seams open after stitching. Flat seams create smoother surfaces. They also distribute stress better than bunched fabric.
Securing Appliqué and Embroidered Elements
Stars, emblems, logos—these separate design pieces get attached now. Your flag design software showed you where they go. Your pinning kept them in place. Now you make it permanent.
Use a zigzag machine stitch around each appliqué element. This stitch type handles fabric movement better than straight stitches. It won't pull out when wind makes your flag dance.
Increase your stitch density here. Aim for 8 to 10 stitches per inch around emblems and detailed pieces. Higher-stress areas need extra reinforcement. Tighter stitching locks the edges down. It prevents lifting and peeling over time.
Work slow around curves and corners. Guide the fabric gentle. Let the machine do the work. Forcing it creates puckering and uneven edges.
Creating Clean, Durable Hems
Hems give your flag finished edges. They stop fraying. They create the clean look that separates durable custom flags from craft projects.
Hem three sides: the top, bottom, and the edge opposite the pole. The hoist edge gets different treatment. We'll get to that.
Fold your fabric over by ⅝ inch to 1 inch. Pin the fold in place. Sew with a double stitch along the inner edge of the fold. This double pass creates strength. Single-stitch hems on flags? They fail fast.
Some official specs call for tighter work. U.S. government flag standards require a ¼ inch double-stitched seam. Creating flags that need to meet specific regulations? Check those requirements first.
The free edge needs extra attention. Wind whips this edge harder than anywhere else on your flag. Add reinforced stitching with 4 to 6 rows of parallel stitching on this hem. Yes, it takes longer. But polyester flag printing materials last years longer with this reinforcement in high-wind areas.
Reinforcing the Hoist Edge
The hoist edge—where your flag attaches to the pole—bears brutal stress. Every gust of wind pulls here. This edge needs serious reinforcement.
Cut a strip of heavy-duty canvas header material. A polyester-cotton blend works well. Make it 2 to 3 inches wide and the full height of your flag. Position this header strip along the hoist edge. Pin it secure.
Attach it with double or quadruple rows of stitching. Four rows aren't overkill for custom outdoor flag projects. This is maximum strength territory. Space your stitch rows even across the header width.
Many flag printing service providers use industrial machines that can run six rows at once. Home sewers run each row separate. It takes time. But this header holds your entire flag together. Don't compromise here.
Installing Your Hardware
Your flag needs to connect to a pole. Two main options exist: grommets or pole sleeves. Your flag's purpose decides which route you take.
Grommets work for flags that attach with clips or rope ties. Install brass grommets with a ⅝ inch inner diameter. Position them at the top and bottom corners of your reinforced canvas header. Brass resists rust. It holds strong through weather.
Use a grommet press or hand-held grommet installation kit. Follow the maker's instructions exact. The grommet sandwiches your fabric—a ring on each side. Proper installation creates a secure metal-reinforced hole that won't tear out.
Pole sleeves suit flags that slide onto poles. Create a channel by folding the hoist-side fabric over. The finished pole sleeve should measure 3 to 4 inches in diameter. Hem the inside edge of this channel. Unhemmed fabric inside a pole sleeve will fray and jam up the pole over time.
Stitch the pole sleeve closed along its length. Use the same UV-resistant thread and double-stitching technique. This sleeve experiences constant friction as wind moves the flag up and down the pole.
Final Quality Control
Your flag is assembled. But you're not done yet. Quality control separates flags that last from flags that fail.
Inspect every seam. Run your fingers along each stitch line. Feel for loose sections. Check corners—these high-stress points show weak stitching fast.
Look for loose thread ends. Any thread tail longer than ¼ inch needs attention. Seal or backstitch every loose end. A lockstitch creates a knot that stops unraveling. A few seconds here prevents stitches from pulling out after weeks of wind.
Examine your hems under good light. Do they lie flat? Any puckering or pulling? These issues show up worse once the flag is up. Fix them now.
Test your grommets if you installed them. Tug firm on each one. It shouldn't budge or show any gap between metal and fabric. A loose grommet will tear out the first windy day.
Your custom flag size options might vary, but these quality standards don't. Small garden flags need the same attention to detail as massive commercial banners. The techniques scale. The precision stays constant.
You've built something that will wave proud. The work you've invested—those extra stitch rows, that reinforcement, those sealed thread ends—these details decide if your flag flies for months or years. You chose years. That matters.
Need Expert Help with Flag Assembly?
Skip the DIY hassle! Our professional team handles everything from design to delivery. Perfect stitching, reinforced edges, and weather-resistant finishing.
7. Finishing Touches
Your flag is assembled. The seams are strong. The design is secure. But you're not quite finished yet. These final details—the ones that might seem small—determine whether your flag looks homemade or professional. They decide if it lasts six months or six years.
Let's add those finishing touches that make all the difference.
Final Hemming for Clean Edges
You've already hemmed three sides. Now check those hems one more time. Run your hand along each edge. Feel for smoothness. Look for consistency.
Double-needle stitching gives you that clean, professional finish. Did you stitch single rows earlier? Now's the time to add that second parallel row. This isn't just about looks. That second row of stitching spreads stress better. It stops hems from pulling loose.
The fly end—that free waving edge opposite the pole—needs special attention now. This edge takes a beating. Wind whips it hard. Add four rows of lock stitches here using your heaviest thread. Space these rows across the hem width.
Yes, four rows sounds like too much. It's not. This makes the difference between flags that fray apart in eight months and durable custom flags that wave strong for years.
Reinforcing for Extreme Conditions
Standard 3'x5' flags handle normal outdoor conditions with basic reinforcement. But larger flags or flags facing harsh weather need extra protection.
Giant flags—anything larger than 10'x15'—live in a different world. These big pieces catch huge wind forces. The corners bear intense stress. For these custom flag size options, add reinforced corner patches. Cut triangular or square patches from your heavy-duty header material. Double-stitch these patches over each corner before adding grommets.
Upgrade your header webbing too. Standard flags use 1.5" to 2" wide polyester webbing. Giant flags need the full 2" width minimum. Some custom flag maker operations use 2.5" or even 3" webbing for flags facing constant high winds.
The fly end on giant flags? Quadruple-stitch it. That means six to eight parallel rows of heavy-duty stitching. This sounds like overkill until you see what 40mph winds do to fabric.
Proper reinforcement on a standard outdoor flag gives you one to two years of reliable use. On commercial flags or those facing coastal winds? This extra work can double or triple that lifespan.
Adding Display Hardware
The hardware you choose connects your creation to the real world. Different mounting systems suit different situations.
Grommets remain the most versatile choice for custom outdoor flag installations. You installed them earlier. Now inspect each one with care. The metal should sit flush against the fabric with no gaps. The washer on the reverse side should be seated tight. Tug each grommet firm. Any movement? Reinstall it.
Standard spacing puts grommets at the top and bottom of the hoist edge. Very large flags need intermediate grommets every 2 to 3 feet along the header. More grommets spread wind load better. They stop flags from tearing between two widely-spaced attachment points.
Pole sleeves work great for indoor displays and street banners. Did you create a sleeve earlier? Check its diameter now. A 2" to 2.5" sleeve fits most standard indoor and parade poles. The stitching along the sleeve should be secure. Any loose sections will jam as you try to slide the flag onto its pole.
Some sleeves are sewn closed at the top. Others stay open. Closed-top sleeves keep the flag from sliding down the pole. Open sleeves allow the flag to be secured with a pole topper or finial.
Rope and toggle systems suit traditional applications—marine flags, very tall commercial flagpoles, historic reproductions. Use 1/4" marine-grade polyester rope. Attach a 4" to 6" wooden toggle to the rope end. This traditional hardware creates that classic look and provides secure attachment.
Working with a flag printing service? Specify your hardware preference as you design custom flag online. Professional operations can install specialized mounting systems you might not have tools for at home.
Decorative Elements for Special Occasions
Not every flag waves on an outdoor pole. Ceremonial flags, parade flags, and indoor displays deserve decorative finishes that standard outdoor flags skip.
Fringe transforms an ordinary flag into something special. This decorative edge suits indoor flags, parade flags, and ceremonial displays. Rayon or nylon fringe measures 2 to 3 inches wide. It's sewn along the bottom and side edges—never the hoist edge where the flag attaches to the pole.
Add fringe after all other finishing is complete. Pin it along the hem edge with care. Stitch it in place with matching thread. The fringe should hang smooth with no gaps or bunching.
Laser-cut edges serve flags with irregular shapes—custom teardrops, unique outlines, or artistic silhouettes. The laser cuts and seals the edge at the same time. This stops fraying without traditional hemming. The result is a clean, modern look that works great for digital flag printing projects with complex shapes.
Most home crafters send their fabric out for laser cutting. This specialized equipment isn't common in home workshops. But the results are worth it for special projects.
The Final Pre-Flight Inspection
You're almost done. But take five minutes for this quality check. It catches problems before your flag goes up the pole.
Verify your design integrity first. Look at your finished flag spread flat. All critical elements—your logo, text, important graphics—should sit at least 1 inch away from finished edges. Nothing should be cut off. Nothing should be hidden by grommets or hardware. Nothing should disappear into the pole sleeve.
The U.S. flag code requires this. Design elements must never be compromised by finishing hardware. This principle applies to all flags, not just national ones.
Check your bleed area. That extra inch of design that extended beyond your cut line should now be folded into your hem. No white gaps should show between your design and the finished edge.
Inspect every stitch. Walk around your flag. Examine each seam under good light. Look for consistency. The stitching should be even and tight. Thread color should match your design—or contrast on purpose if that's your aesthetic choice.
Reinforced areas deserve extra attention. Those four rows of stitching on the fly end? They should be parallel and spaced well. Corner patches should lie flat with no puckering. The header should be secured with no loose sections.
Test your hardware one final time. Pull on each grommet. Slide your hand through the pole sleeve if you made one. Tug the rope and toggle. Everything should be rock solid.
Examine specialty treatments last. Fringe should hang smooth. Laser-cut edges should be sealed with no loose fibers. Any decorative elements should be attached tight.
Your flag passes inspection? Then you're done. What started as digital files and flat fabric now waves and moves. You created something that will catch eyes, represent ideas, and hold strong through wind and weather. That's worth celebrating.
8. Tips for Special Designs and Double-Sided Flags
Some flags need to speak from both directions. A business sign facing a two-way street. A parade banner that people view from either side. A memorial flag that deserves perfect presentation no matter which way you approach it.
Double-sided flags solve this problem. But they're not simple projects. They need different thinking, different materials, and different construction methods.
Let's talk about when you need them—and how to build them right.
Understanding True Double-Sided Construction
Here's what most people get wrong: a double-sided flag isn't just a regular flag that happens to look good from both angles.
Double-sided flags use separate construction. You're creating two individual flags, then joining them with a special liner between. Each side gets its own fabric layer. Each side displays a correct-reading image—not a mirror reflection.
That middle layer—the opaque block-out liner—makes the magic happen. This barrier, 140-180 gsm polyester, stops light from passing through. Without it, you'd see the back design ghosting through the front. The liner keeps each side crisp and independent.
This construction creates real differences you need to understand before you order from a custom flag maker or attempt this at home:
Weight jumps up. Double-sided flags weigh 30-40% more than single-reverse flags of the same size. You're using two full fabric layers plus that liner. Physics doesn't negotiate.
Cost follows weight. Expect to pay 30-40% more for double-sided construction. You're buying more material. The flag printing service does more work. The math is straightforward.
Durability takes a hit. That extra weight creates more stress on seams and mounting points. Wind pulls harder on a heavier flag. Double-sided flags last a bit less long than standard ones in the same conditions.
But you gain something crucial: perfect visibility from both directions. No mirror images. No backwards text. Both sides show what you designed.
Compare this to standard single-reverse flags. Those show your true design on one side. The back displays a mirror image—readable, but reversed. Light passes through the fabric. You can often see the reverse image from the front. For many applications, this works fine. But for professional displays, ceremonial uses, or locations where both sides get equal viewing? Double-sided construction becomes essential.
Preparing Artwork for Double-Sided Printing
The file prep here differs from standard flags. Your flag design software workflow needs adjustment.
Create and submit two separate files—always. Name them: "Flag_Front.ai" and "Flag_Back.ai" works well. Even if both sides show identical designs, your *digital flag printing* provider needs separate files for each layer. This prevents confusion during production.
The safe area becomes more critical. Keep all important elements—text, logos, critical graphics—at least 1 inch from the finished edge. Double-sided construction creates thicker seams. Those seams can swallow design elements that sit too close to edges.
Bleed requirements stay the same. Extend your background design 0.5 to 1 inch beyond the cut line on all sides. This extra area ensures color reaches the very edge after trimming and hemming. No white gaps will appear.
Vector formats remain your best choice. Submit AI, EPS, or PDF files when you design custom flag online. These scale well and give print providers what they need. Must use raster images? Ensure they're 150 dpi minimum at full flag size. Lower resolution creates fuzzy, pixelated results.
Color specification matters more with double-sided work. Use Pantone Matching System (PMS) codes to specify colors. Don't trust screen colors. Fabric printing shifts colors in ways you can't predict. PMS codes give your polyester flag printing team a precise target.
Design complexity affects print method choice. Planning gradients, subtle color transitions, or photographic elements? Specify digital printing when you order. Traditional silkscreening can't reproduce smooth gradients well. Digital methods handle these special designs well.
Material Selection for Extra Strength
Standard 200D polyester works great for regular flags. Double-sided flags need more.
Upgrade to 300D polyester for double-sided construction. This heavier fabric provides better structure. It supports the extra weight better. The increased thickness also prevents the fabric from buckling or distorting under the strain of multiple layers.
Working with a custom flag maker on a large double-sided project? Discuss material options up front. The weight difference between 200D and 300D might seem small on paper. But it makes real differences in how your flag performs.
Special Considerations for Installation and Use
That extra weight creates challenges beyond construction. You need to think about where and how this flag will fly.
Wind stress multiplies with weight. A heavier flag catches more wind force. That force transfers to your mounting points—grommets, pole sleeves, whatever connection system you chose. Request an extra-strength canvas header for double-sided work. Standard headers can fail under this increased stress.
Most manufacturers recommend flying double-sided flags in moderate wind conditions. Constant high winds will wear them faster. The seams experience more strain. The fabric takes more punishment.
Pole selection matters too. That 30-40% weight increase means your flagpole needs to be sturdy enough to handle it. A pole rated for a 3-pound flag might struggle with a 4-pound double-sided version. Check weight ratings before installation.
Indoor displays work well for double-sided flags. Conference halls, lobbies, parade routes where crowds surround the flag—these controlled environments let double-sided construction shine without the durability concerns of constant outdoor exposure.
When Double-Sided Construction Makes Sense
Not every project needs this complexity. Think about when the extra cost and weight deliver real value.
Two-way traffic situations demand double-sided flags. Street banners, intersection displays, parade floats—anywhere people view from both directions. Single-reverse flags look wrong from one side. Double-sided construction solves this.
Professional and ceremonial applications benefit from the perfection. Government buildings, memorial services, corporate headquarters—these settings demand polish. Backwards text on a reverse side looks unprofessional. Double-sided flags eliminate this concern.
Custom outdoor flag installations where the pole sits in the middle of a space need this too. Parks, plazas, roundabouts—the flag rotates in the wind. Viewers approach from all angles. Both sides need to look intentional.
But for flags mounted against buildings or along highways where one side dominates viewing? Save your money. Standard single-reverse construction works fine. Put your budget toward larger size or more durable custom flags instead.
Double-sided flags represent the premium end of flag making. They cost more. They weigh more. They require more careful planning. But for situations that demand perfect presentation from every angle, nothing else delivers quite the same impact.
9. Optional: Flag Care and Display
You built something beautiful. Time, care, and attention went into every seam. That flag deserves proper display and maintenance. Protect your investment. Honor the work you put in.
Here's how to make your custom outdoor flag last while it waves proud.
Matching Your Flag to the Right Pole
Size matters more than you think. Your flag and pole need to work together. This affects how good it looks and how long it survives.
Here's the simple rule: your flag's length should be one-quarter to one-third of your flagpole's height. This creates visual balance. The flag moves properly in wind. No strain on flag or pole.
A 1:5 ratio works well for formal displays. That's flag length to pole height. A 3-foot flag pairs with a 15-foot pole.
Too large a flag? Excess stress on the pole. Wind catches that big surface. The pole bends. Hardware fails. Too small? Your flag looks timid and lost. It vanishes when it should grab attention.
Here's what works for common pole heights:
5 to 8-foot house-mounted poles pair well with 2.5'x4' or 3'x5' flags. These smaller displays suit home entryways and gardens.
20-foot residential poles are standard in-ground height for most homes. They need 3'x5' or 4'x6' flags. This is where most custom flag size options from your flag printing service start to shine.
30-foot poles at larger buildings and businesses call for 5'x8' or 6'x10' flags. You create presence here. The flag needs to match the scale.
40-foot commercial poles at schools and office buildings need 6'x10' or 8'x12' flags. At this height, smaller flags vanish against the sky.
60-foot installations at major civic locations need 10'x15' or 12'x18' flags. This is serious display territory.
80-foot poles at corporate campuses and government centers demand 15'x25' or 20'x30' flags. Nothing smaller creates the right impact.
Flying multiple flags on one pole? Add up the total square footage. The combined area can't exceed what a single flag would be. A 20-foot pole rated for a 4'x6' flag (24 square feet) can handle a 3'x5' flag (15 square feet) plus a 2'x3' flag (6 square feet) together. The math keeps you safe.
Displaying Your Flag the Right Way
Placement affects visibility. Install your flagpole in an open area. Trees, buildings, and other blocks create rough wind patterns. These damage flags faster.
Night display needs lighting. Planning to show your durable custom flags around the clock? Proper light becomes a must. The flag should be lit after dark. This isn't just tradition. It's respect for what your flag stands for.
Weather awareness extends flag life. Severe conditions beat up flags fast. High winds, heavy rain, snow, ice. Bring your flag indoors during extreme weather. Yes, this takes effort. But those few minutes can add months to your flag's life.
Keeping Your Flag Clean and Fresh
Regular washing makes a big difference. Your flag collects dust, pollen, pollution, and salt spray if you're near an ocean.
Hand washing gives you the most control. Use cold water and mild detergent. Swish the flag with care. Rinse well. This gentle approach protects the fabric and keeps colors bright.
Machine washing works if your fabric allows it. Use a gentle cycle. Cold water works best. A mesh laundry bag adds protection during the wash.
Wash every one to two months during regular use. High-pollen seasons or dusty, salty areas call for more frequent cleaning. Your polyester flag printing materials handle washing well. Just air-dry before storage.
Never fold or store a damp flag. Moisture trapped in fabric creates mildew. That musty smell becomes permanent. Worse, the fabric weakens.
Inspection and Quick Repairs
Walk around your flag every few weeks. Look close at the hems and corners. These high-stress areas show wear first.
Fraying threads? Catch them now. A few loose stitches turn into torn seams fast once wind gets involved. Small repairs take minutes. Major damage means replacing the whole flag.
Fading happens over time. You might not notice day to day. But compare your flag to a photo from installation day. The difference tells you when to replace it.
Smart Storage Practices
Your flag needs rest periods. Rotate seasonal designs or take it down during harsh weather.
Store in a cool, dry place away from direct sunlight. Attics get too hot. Damp basements create mold problems. A closet shelf inside your climate-controlled home works well.
Fold with care to prevent permanent creases. Those sharp fold lines weaken fabric over time. Some people prefer rolling flags instead of folding.
Skip plastic bags. They trap moisture. Use breathable cotton storage bags or acid-free tissue paper instead.
Understanding Real Lifespans
Even the best-made flag won't last forever outdoors. Wind, sun, and weather take their toll.
An outdoor flag flown sunrise to sunset in fair weather averages about 90 days of life. That's three months of display in normal conditions.
Continuous 24/7 exposure? Harsh coastal winds or intense desert sun? That lifespan drops to one to three months. This isn't a defect. It's physics. UV radiation breaks down fabric. Wind stress wears out seams. No material escapes these forces.
Your custom flag maker built durability into the design. But nature wins over time. Budget for periodic replacement with ongoing display.
Honoring Worn Flags
Your flag will fade. Hems will fray. Colors will lose their brightness. When it becomes too worn for dignified display, retire it with respect.
Traditional retirement uses a ceremonial burning. Many veterans' organizations and scout troops conduct these ceremonies. They'll accept your worn flag and give it proper farewell.
This act of respect closes the circle. You created something with care. You displayed it with pride. You honored it at the end. That matters more than you think.
Your flag waves because you made it happen—from the first design file to the final display. Take care of it. It stands for your vision, your work, and your message to the world.